
|
275.033 bytes |
Service Hints & Tips |
Document ID: DDSE-3QNJFL |
PCServer704 - Miscellaneous Information
Applicable to: World-Wide
Bays
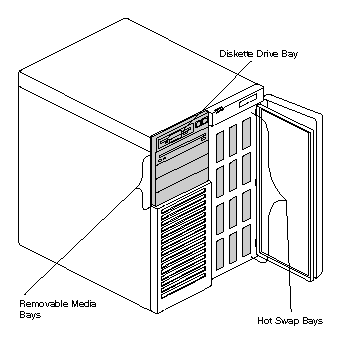
The server comes with one 3.5-inch, 1.44 MB Diskette drive, and a SCSI CD-ROM drive. (1 MB equals approximately 1 000 000 bytes.) The number of preinstalled hard disk drives in the server varies according to the model.
CD-ROM Drive: All models come with a SCSI-2 CD-ROM drive.
Diskette Drive: The 3.5-inch, 1.44 MB diskette drive uses 1 MB and 2 MB diskettes.
Open Bays: Accommodates up to 12 hot-swap, 3.5-inch hard disk drives. There is additional open space in the top left bay for three removable-media drives, such as diskette or tape backup.
Hard Disk Drive: The number, capacity, and location of the hard disk drives vary, depending on your model.
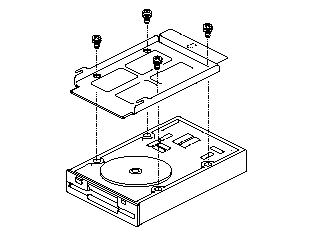
Board Support Panel
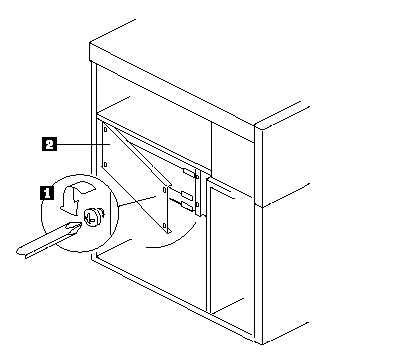
1 Screws
2 Support panel
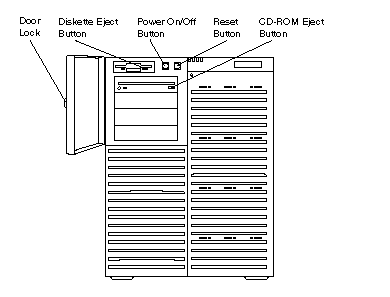
Controls (Front)
Controls and Features (Back)

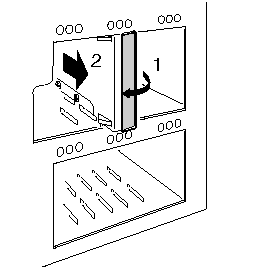
Diskette Drive (3.5-Inch)
Diskette Drive Tray
(Bottom View)
Drive (SCSI-2)
SCSI Drive Status LED Board
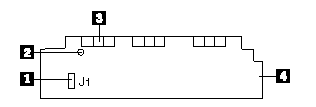
1. J1, cable to SCSI backplane
2. Hole for standoff
3. Status LEDs (three sets of three); insert board so these appear in slots in front EMI panel
4. End facing slot in center divider
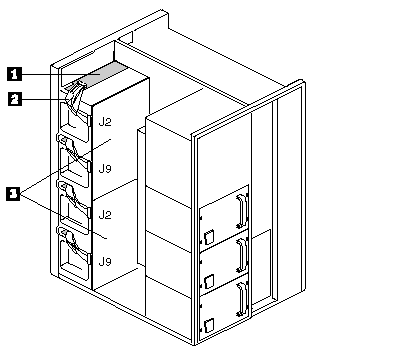
1. Status LED board (one board over each row of SCSI drives)
2. Cable form J1 on status LED board to J2 or J9 on SCSI backplane (one for each board)
3. SCSI backplanes, upper and lower
Drive Tray (5.25-Inch)
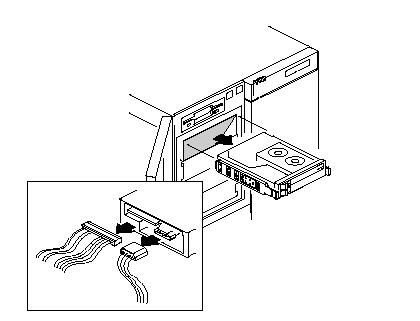
Drive Tray (Hard Disk)
(Bottom View)

Indicator Lights (Front)

Intrusion Alarm Switch and Cable
Note
Cables are on the front-facing side of the front panel control board.
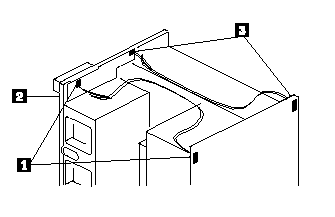
1. Connector J5 on the front panel control board; switch located at the back near the power supply.
2. Connector J2 on the front panel control board; switch located at the back above the board cage area.
3. EMI door switch location (not shown); direct contact no cable.
Liquid Crystal Display
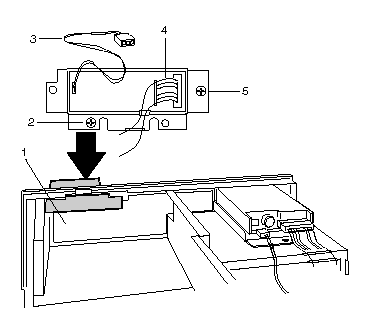
1. Remove screws that secure the liquid crystal display (LCD) to the chasis.
2. From inside the chasis, pull the carrier back out of opening.
3. To remove the LCD form the carrier, pry out the four plastic riveys.
4. Put the replacement LCD on the carrier, and secure the carrier with four plastic rivets.
5. From inside the chasis, place the carrier assembly back in the chasis opening. Make sure the carrier flanges make good contact with the chasis around the opening. (You may need to spread the flanges out a little.)
6. Reinstall the two screws to secure the carrier to the chasis.
1. Front panel control board
2. Two screws on LCD carrier
3. Backlight power connector from LCD to control boar
4. Signal connector from LCD to control board
5. Mounting Screw
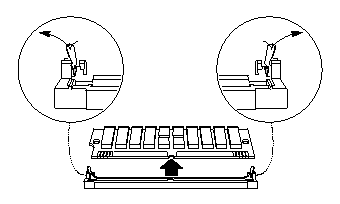
Memory Board
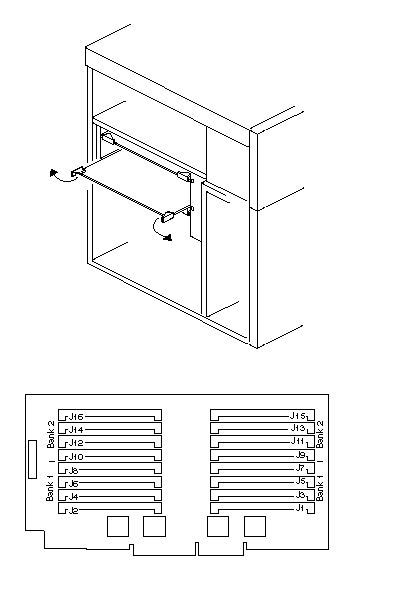
Memory Configurations
The PC Server 704 - Type 8650 supports the following memory configurations.
Bank0 Bank1
16MB SIMM X 4 No memory installed
16MB SIMM X 8 No memory installed
16MB SIMM X 8 16MB SIMM X 8
16MB SIMM X 8 32MB SIMM X 8
32MB SIMM X 4 No memory installed
32MB SIMM X 8 No memory installed
32MB SIMM X 8 16MB SIMM X 8
32MB SIMM X 8 32MB SIMM X 8
64MB SIMM X 4 No memory installed
64MB SIMM X 8 No memory installed
64MB SIMM X 8 64MB SIMM X 8
Memory SIMM
Processor Assembly
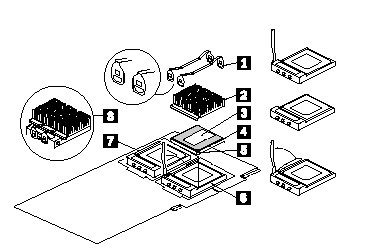
1. Heat sink retention clips
2. Heat sink
3. Thermal grease
4. Processor
5. Pin 1 location
6. Lower processor socket with lever in open position
7. Upper processor socket with lever in closed/locked position
8. Complete assembly
|
Search Keywords |
| |
|
Hint Category |
Hardware Maintenance Information | |
|
Date Created |
28-05-96 | |
|
Last Updated |
19-05-98 | |
|
Revision Date |
15-05-99 | |
|
Brand |
IBM PC Server | |
|
Product Family |
PC Server 704 | |
|
Machine Type |
8650 | |
|
Model |
| |
|
TypeModel |
| |
|
Retain Tip (if applicable) |
| |
|
Reverse Doclinks |