
|
170.461 bytes |
Service Hints & Tips |
Document ID: LWIK-3SHJBN |
TP 760E/ED/EL/ELD - Installing Memory
Applicable to: World-Wide
These instructions can also be found in the online or hard copy of your User's Guide.
Installing and removing a DIMM
1.Touch any metal object with your hand.
2.Turn off the computer; then disconnect the AC Adapter and all cables from it.
3.If you are using any locking device with a security keyhole, remove it.
4.Press and slide the security latch  on the right side of the computer to unlock the security lock.
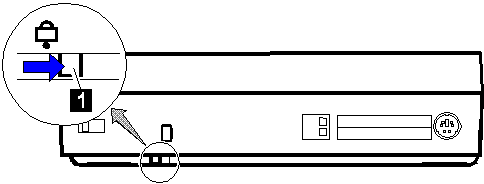
Some pressure might be needed to slide the latch.
5.Turn over the computer. Press the switch  as shown (
 ) and slide the memory slot cover and remove it (
 ).
).
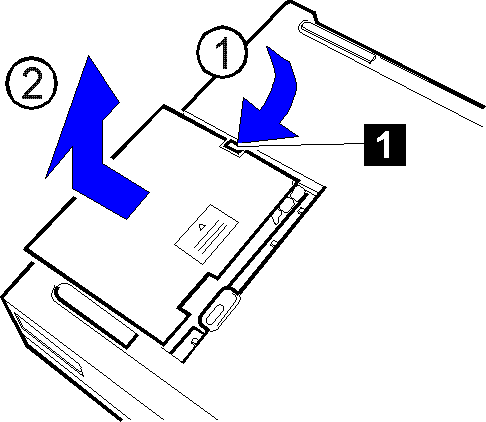
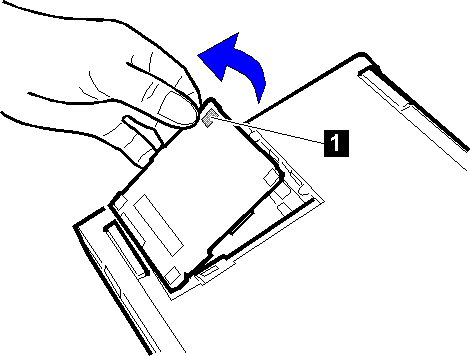
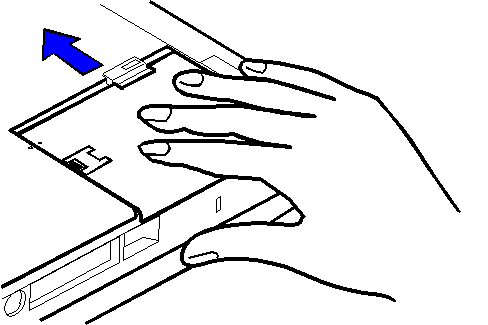
6.Remove the DIMM adapter by lifting up the edge  from the computer, and place it on a flat surface.
|
Attention: |
7.Which are you going to do?
Install a DIMM
Go to the next step.
Remove a DIMM
Go to step 10.
8.Insert the DIMM (available as an option) into either of the vacant sockets on the DIMM adapter.
|
Attention: |
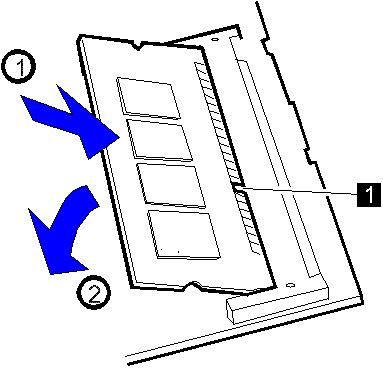
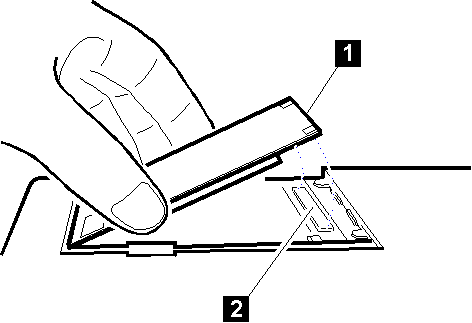
1.Find the notch  on the side of the DIMM.
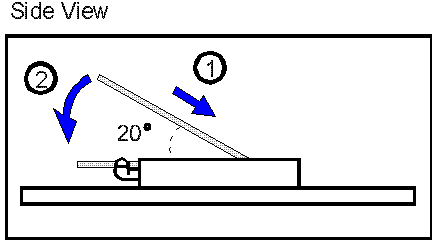
2.With the notch of the DIMM lined up with the projection of the socket, insert the DIMM, at an angle of approximately 20›, into the socket ( ). Then press it firmly.
3.Pivot the DIMM until it snaps into place ( ).
).
If you have another DIMM to install, insert it into the other socket in the same way.
9.Go to step 11.
10. Press out on the latches on both edges of the socket at the same time and remove the DIMM.
|
Attention: |
Be sure to save the DIMM for future use.
11. Attach the DIMM adapter to the computer.
1.Turn over the DIMM adapter.
2.Place it into the memory slot and then align its connector  with that of the memory slot
  .
.
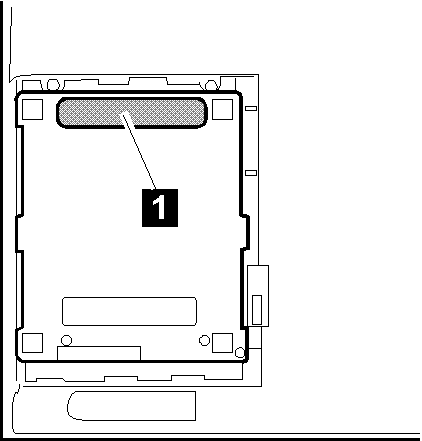
3.Press on the shaded area  until the DIMM adapter snaps into the memory slot connector.
Press on three points (both sides and center) of the shaded area.
4.Make sure the DIMM adapter is firmly connected.
12.Replace the memory slot cover:
1.Align two marks on the memory slot cover and the bottom of the computer ( ). Seat the cover from
  and then
  as shown.
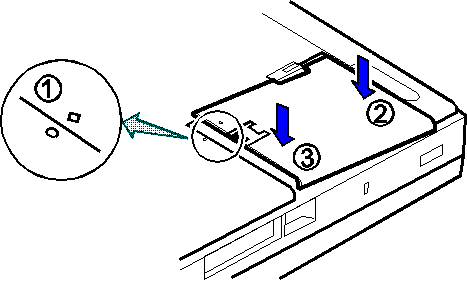
2.Slide the memory slot cover until it snaps into the computer.
3.Make sure the latch is in the correct position, as shown.

13.To confirm that the DIMM is correctly attached to the computer, do the following:
1. Calculate your total memory size by adding the DIMM memory size to the base memory size (for example, 7808KB).
For example, if you installed two 16MB DIMMs in addition to 7808KB base memory, the total memory size can be calculated as follows:
16(MB) x 2 x 1024(KB) + 7808(KB) = 40576(KB)
2.Start Easy-Setup and confirm the memory size count at the upper left corner of the screen as shown:
|
40576 KB OK
|
|
Note: |
If a 201 error code appears under the memory count, turn off the computer and go to "Installing and Removing the DIMM for the 760E, 760ED, or 760EL" to reinstall the DIMM.
|
40576 KB OK 201 |
3.Is the total memory size the same as the value you calculated in step 1?
Yes
Go to the next step.
No
Turn off the computer and go to "Installing and Removing the DIMM for the 760E, 760ED, or 760EL" to reinstall the DIMM.
4.Select Test from the main menu of Easy-Setup; then select Memory.
The memory test starts.
|
Note: |
To prevent the installed DIMMs from being removed from the computer, attach a lock to the security keyhole. See "Using the Security Lock".
15.Close the keyboard and reconnect all cables.
|
Note |
|
Search Keywords |
| |
|
Hint Category |
Memory | |
|
Date Created |
12-03-98 | |
|
Last Updated |
06-05-98 | |
|
Revision Date |
29-04-99 | |
|
Brand |
IBM ThinkPad | |
|
Product Family |
Thinkpad 760E, Thinkpad 760ED, Thinkpad 760EL/ELD | |
|
Machine Type |
9546, 9547 | |
|
Model |
Various | |
|
TypeModel |
| |
|
Retain Tip (if applicable) |
| |
|
Reverse Doclinks |